Our garden was delivered today and we wasted no time getting all set up!
Honestly, setting up the garden was so easy it felt a little like cheating. Aside from choosing a relatively level location in the yard, there was absolutely NO preliminary work required. No ground to till, no soil to prepare, no worrying whether that soil would be viable for the plants, no fencing to put up to keep out the critters…see what I mean about cheating? It’s certainly a different way to garden – efficient to be sure. I like efficient. I’m over feeling like a cheater now!
Minimal assembly required.
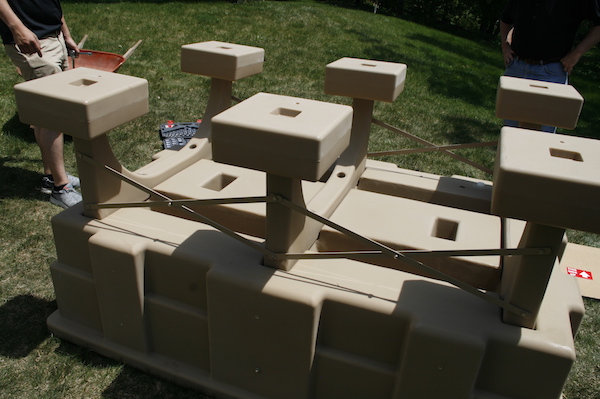
The garden arrived in a big cardboard box. It’s heavy, so it was all hands on deck to get it moved into position, but it only required three tools to assemble. Once in position, it went together in under 20 minutes.
Again, efficiency.
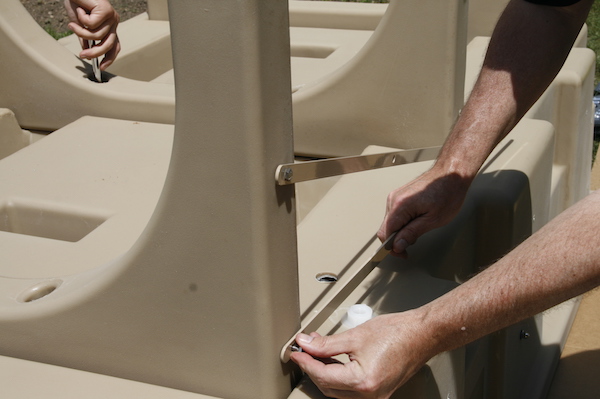
First the legs get attached to the base, and six feet get attached to the legs. To reinforce the legs, metal bars get screwed into place in a cross pattern. Full, the container itself will weigh over 1500 pounds so this reinforcement is a must.

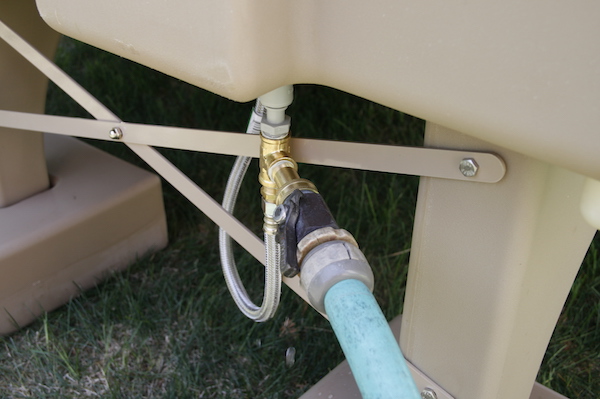
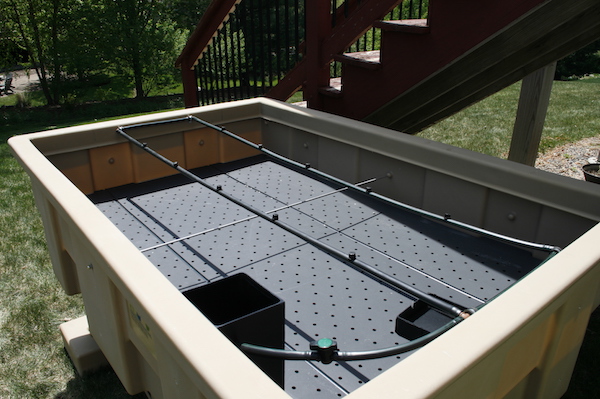
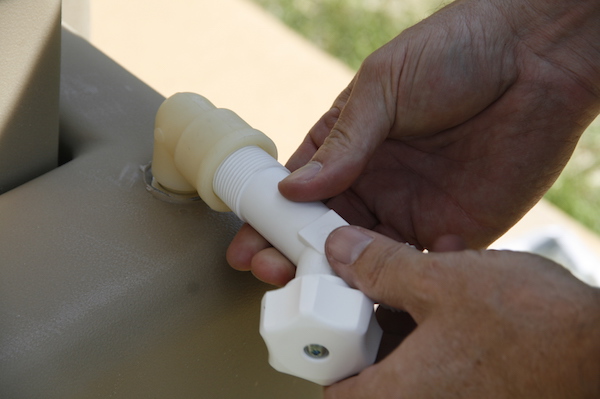
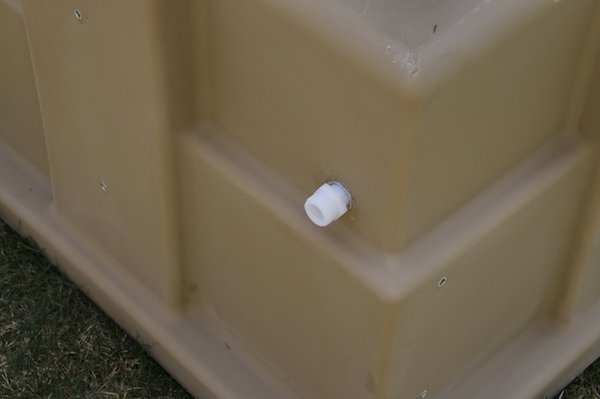
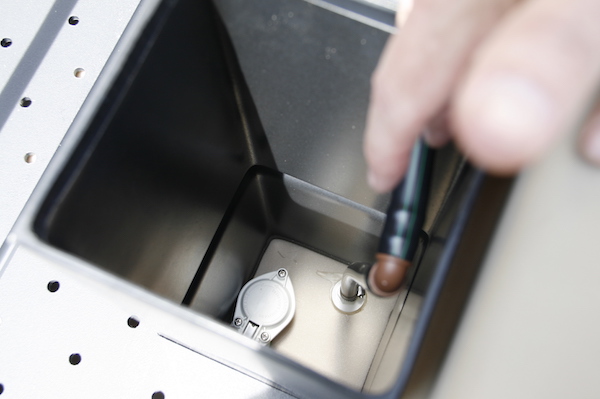
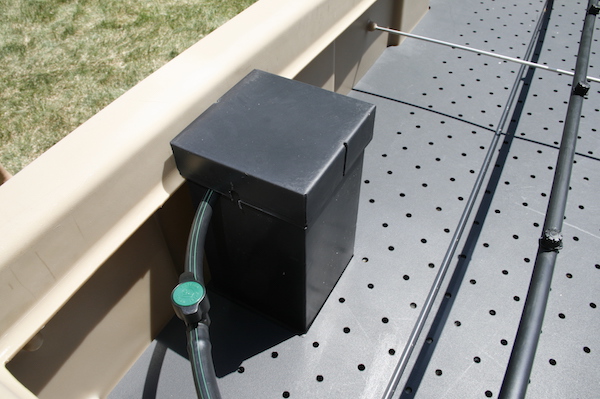
From there we flipped the garden over to its upright position and placed the plastic barrier into place over reservoir area. We assembled and attached the intake ports for water from our hose to fill the water reservoir. Then we attached the drainage port for overflow water to exit the reservoir once it gets full. We also placed the sensor for the reservoir in the “black box” which regulates the watering. This black box is essentially like the tank for your toilet, complete with a “float” that tells the water when to shut off. It can be adjusted so that the box fills to about 4” of water.
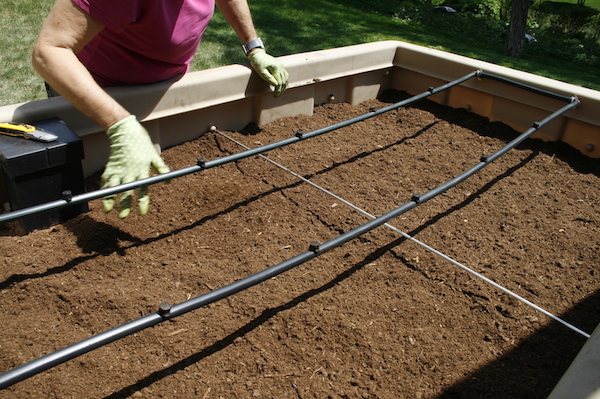
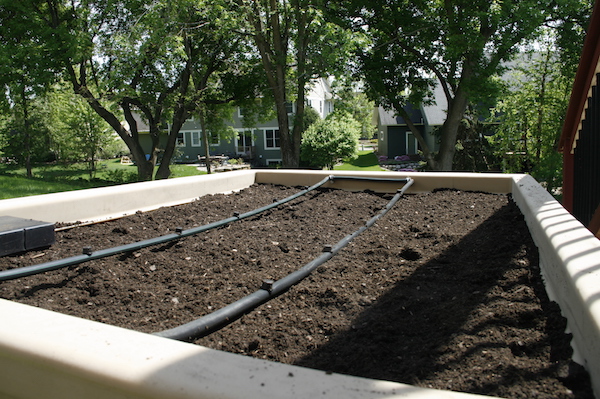
The actual hoses to water the plants come placed in the garden already. They cross over and then back dividing the garden into thirds, and there are 5 nozzles along each stretch.
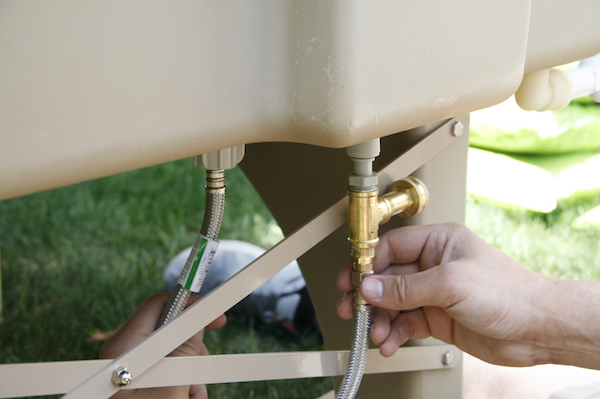
For now, we’ll be installing a hose splitter and running one side from the house to the garden as the water supply. We’ll also install a timer on that side so we can water on a timed schedule (morning and evening). Eventually we’ll get the mechanical pump so that we don’t have to run the hose from the house. That will make the Eco Garden a self-contained system, using and recycling the water from the reservoir.
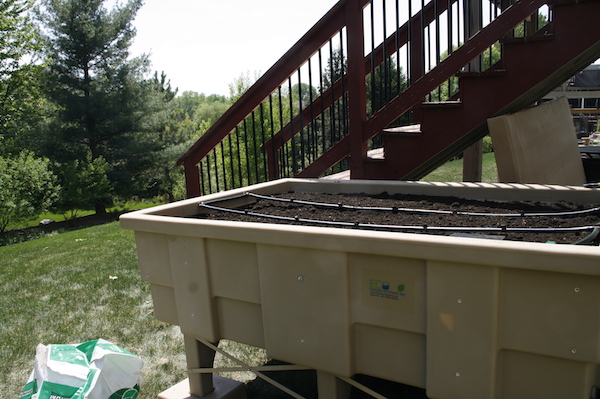
So with that, in all its glorious efficiency, the container was set up and ready for soil!
Fill ‘er up!
Since it is recommended to let the soil sit a few days before planting, we wanted to get it in ASAP. We used a combination of peat moss and organic potting soil. We used an entire 3 cubic foot bag of peat moss plus about ¼ of another to cover the bottom of the garden. This helps retain moisture and also helps keep soil out of the reservoir.
We chose organic potting soil for the garden – Nature’s Care Organic Raised Bed Soil by Miracle Gro to be exact. Purchased at Home Depot. Eco Garden recommends about twelve (12) bags of soil, but ours were 1.5 cubic feet (larger than normal) so we ended up using only about eight (8). We filled the garden to the very top to accommodate for settling.
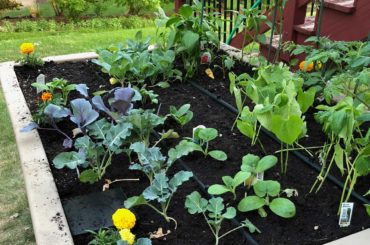
So now we’re all set to plant! Next up – deciding what to grow in the garden…